Showing posts with label tutorial. Show all posts

Sunday, December 18, 2011

Starbucks Peppermint Mocha Inspired Mani!

My favorite drink around the holidays is Starbucks' Peppermint White Mocha. I wanted to do a mani using a marbling technique without water, since we all know water marbling isn't so easy. This is the look I came up with!

I started with Sephora by OPI's base coat, which I've been loving lately.

Then I used the marbling technique and painted my nails one thick coat of Sephora by OPI's Under My Trench Coat. I then blobbed on a white polish & took a dotting tool to swirl it to look like cream in a hot drink!


Now it was time to stick on same festive designs I had premade using nail art pens & a piece of plastic. I made two Starbucks cups for my ring fingers and some candy canes for my thumbs.


I stuck them on using Sally Hansen Advanced Hard As Nails Strengthing Top Coat.. which I hate writing out.. & then also topped all my nails with this top coat!

I love this finished result!
I hope you enjoyed & if you try it out let me know!

xoxo


Monday, September 5, 2011

Tutorial: Glam Lady Bug Nails!

Sometimes I like to just have something cute on my nails instead of a very dramatic and complicated design.
This tutorial will show you how to make each and every one of your nails into a good luck charm!

The products I used are pictured below.
China Glaze Ruby Pumps, L.A. Colors Art Deco Poish in Black, Nail Ritz Pen in Black (even though white is featured), a dotting tool, and a post-it note.
I also used a cream red polish, and some pearls.

First I started with Seche Clear base coat, as usual, and then I added a cream red polish as a base color.
Next, I used two coats of China Glaze Ruby Pumps to give the lady bug a nice sparkle!
After this, I used the L.A. Colors polish in black to create one line down the center and then a black tip.

Then, I added three black spots on each side with the Nail Ritz pen.
Lastly, I dotted some clear polish on the tip and added two pearls for eyes!
I sealed with a Seche Vite topcoat and this is the finished result..


Hope you enjoyed and try this look out!
xoxo

Wednesday, August 10, 2011

Juicy Luscious Lip!

I've been using this technique ALL summer for huge, juicy, fruity, gorgeous, pink lips! 
It's very simple even though there are a few steps.

Let's go!

These are the products I used listed from left to right.
NYX Round Lipstick in Strawberry Milk. Soft Lips Conditioning Lip Tint in Pearl Tint. NYX Pot Lacquer in Coffee Run. C.L. Bigelow Blueberry Rose Salve. Wet N Wild Glassy Gloss.

So the first step is to condition your lips with the Blueberry Rose Salve.
Next I added the Soft Lips Pearl Tint to add our first layer of shine. This gives the lips a subtle gloss without using gloss.

Over the tint I used NYX Round Lipstick in Strawberry Milk.

This is what it looked like.

Next I used NYX Pot Lacquer in Coffee Run to give a level of sparkle and gloss!
Now the lips look like this. Gorgeous and Luscious, but for that shine to look like dew drops on some fresh fruit we need to add one more layer of shine, which is the Wet N Wild Glassy Gloss, my favorite clear gloss ever.

These are the finished lips with shine that will last all day!

Hope you try this out!
xoxo

Thursday, June 9, 2011

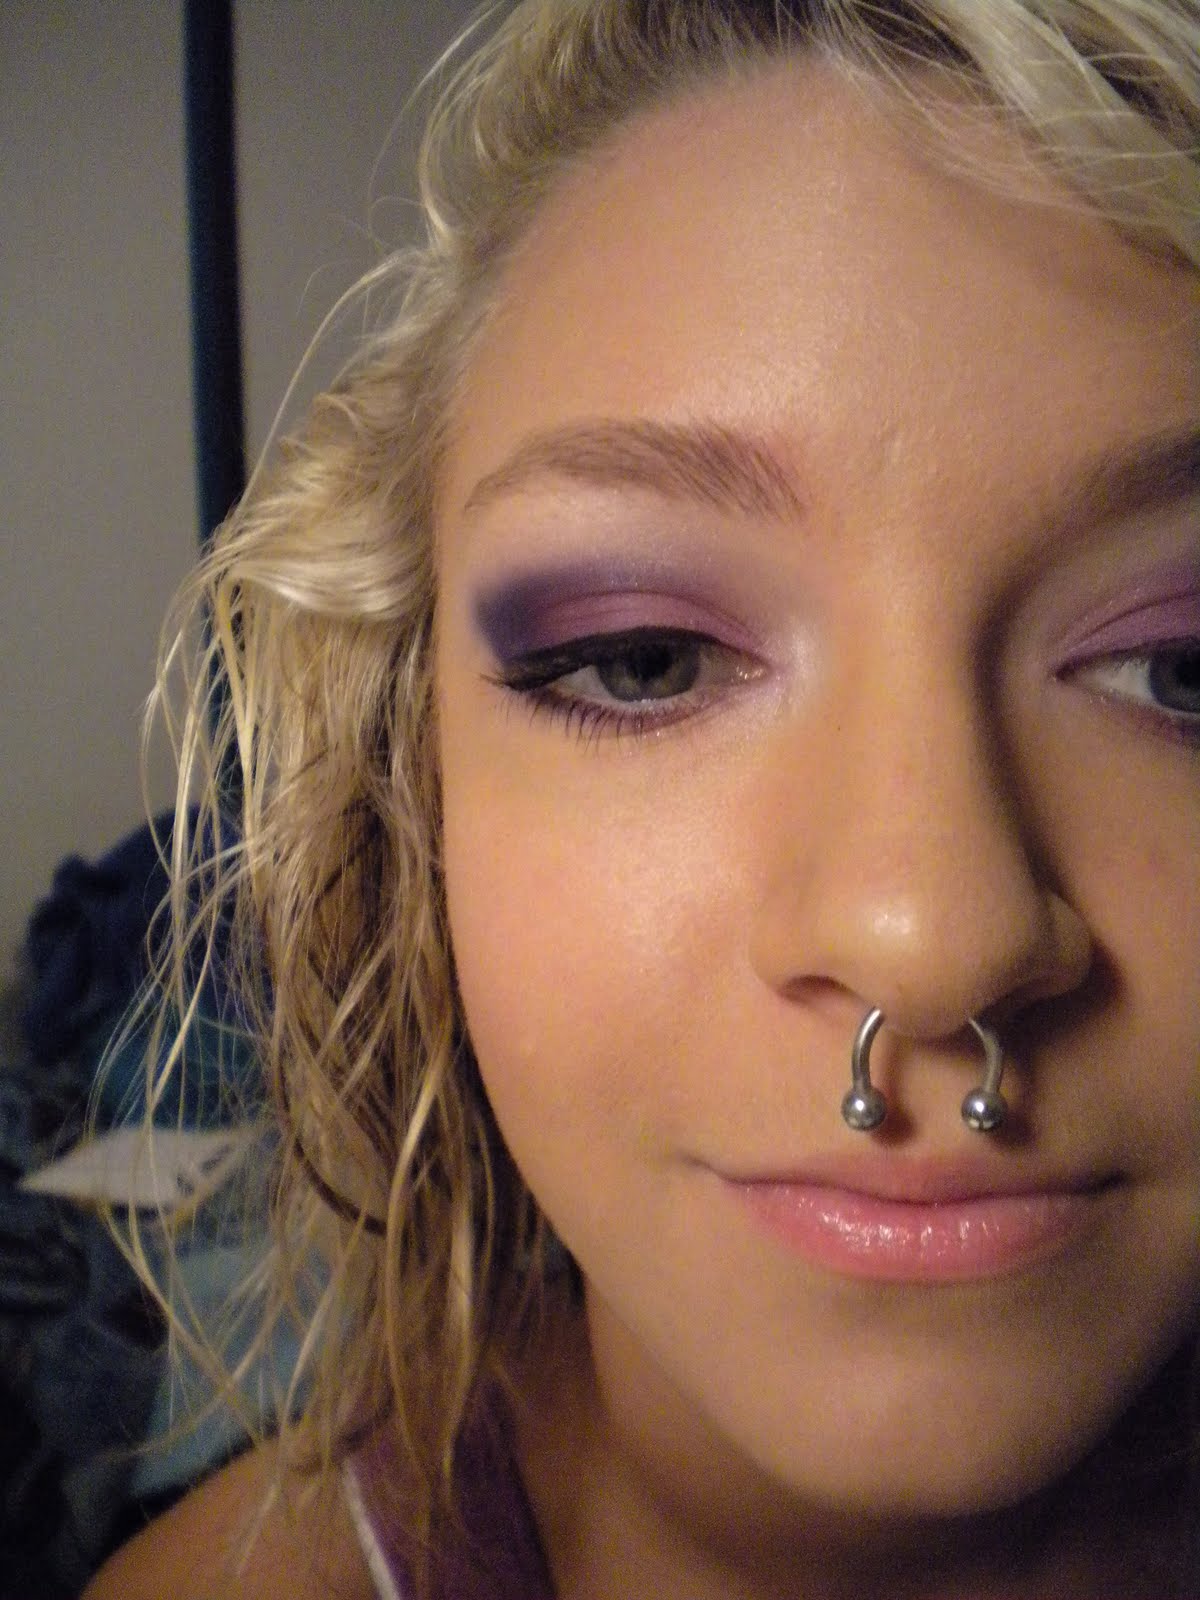
Tutorial: Purple Inglot Eyes!

Purple is my absolute favorite color to wear on my eyes. I feel like I own every purple shadow from every company that makes any purples! However.. this tutorial is using Inglot purples, which are amaazzing. Inglot might be my favorite cosmetic brand right now.

Anyway here is a couple shots of the look..
My camera is not the super best, but you get the idea.
Alright so I got it in some goofy lighting with some goofy faces but hey I am new to the tutorial making process! Okay!

Okay so the first thing I did was prime my eyes with Urban Decay Primer Potion in Eden, the matte one. Then I used NYX Jumbo Eyeshadow Pencil in Milk all over the lid and up into the crease a bit.

The first color I used was this one from Inglot. I'm not sure what the number is but I will put it in when I find out. It's a sparkly pinky purple. I applied this on the inner third of the eye.
Next I used this Inglot color on the middle third of my lid, using a small eye shadow brush and blending as I went.

After that I blended this dark purple Inglot shadow into the outer corner and blended it all the way over to the first color right under the brow bone.
I blended the edges with a fluffy brush, which was fairly easy because these shadows are so creamy and silky.
I used an opalescent white as a highlight under the brow and in the inner corner.
I finished with a thin line of black gel liner and mascara.

For the rest of the face I just used my foundation powder and then contoured with a matte bronzer and added a subtle peachy pink blush.

And then I finished with NYX Round Lipstick in Strawberry Milk and some clear sparkling glass over top of it.

Hope you enjoyed.

xoxo