Wednesday, August 10, 2011

Juicy Luscious Lip!

I've been using this technique ALL summer for huge, juicy, fruity, gorgeous, pink lips! 
It's very simple even though there are a few steps.

Let's go!

These are the products I used listed from left to right.
NYX Round Lipstick in Strawberry Milk. Soft Lips Conditioning Lip Tint in Pearl Tint. NYX Pot Lacquer in Coffee Run. C.L. Bigelow Blueberry Rose Salve. Wet N Wild Glassy Gloss.

So the first step is to condition your lips with the Blueberry Rose Salve.
Next I added the Soft Lips Pearl Tint to add our first layer of shine. This gives the lips a subtle gloss without using gloss.

Over the tint I used NYX Round Lipstick in Strawberry Milk.

This is what it looked like.

Next I used NYX Pot Lacquer in Coffee Run to give a level of sparkle and gloss!
Now the lips look like this. Gorgeous and Luscious, but for that shine to look like dew drops on some fresh fruit we need to add one more layer of shine, which is the Wet N Wild Glassy Gloss, my favorite clear gloss ever.

These are the finished lips with shine that will last all day!

Hope you try this out!
xoxo

Friday, June 10, 2011

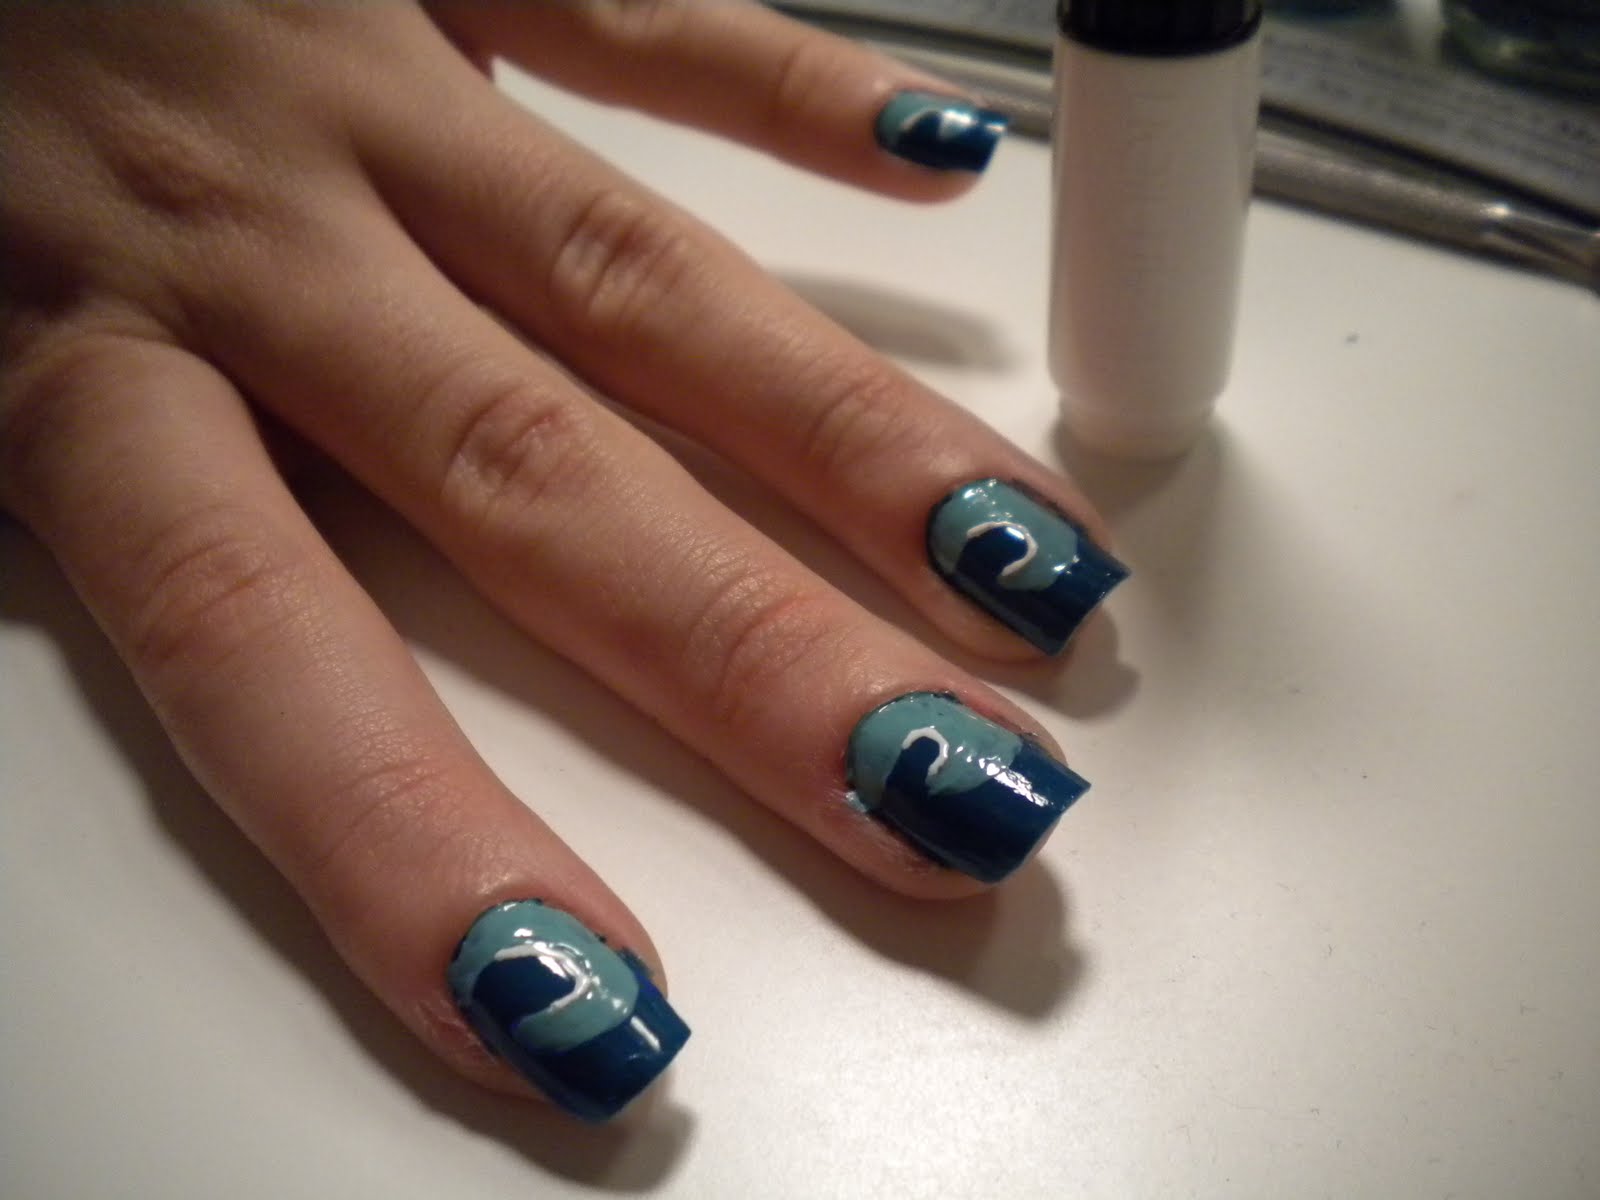
Tutorial: Ocean Wave Nails

I did a simple nail look today that was inspired by the ocean waves. I've had this idea in my head for a while and I think it just looks so cool on my nails!

Here are the products I used..
Seche Clear base coat and Seche Vite top coat.
Two NailRitz pens in blue and white, China Glaze Shower Together, China Glaze For Audrey, A Color Club Nail Art Brush in Turquoise Glitter, Mango Miracle Cuticle Remover, a nail file, a cuticle pusher, and I also used a small nail art brush but I forgot to include it in the photo.

So the first thing I did was use my base coat and then apply two coats of China Glaze Shower Together.

Next, I used the NailRitz pen in blue to create the outline of the ocean wave.

After that, I took my small nail art brush, which you can get for a couple dollars at Sally's probably, and I filled in the wave with China Glaze For Audrey.

I took the NailRitz pen in white and just highlighted the inside curl of the wave.

The last color I used was a Color Club nail art brush in turquoise glitter and I just added this sparsely inside the wave to give it some dimension.

After adding Seche Vite top coat this is the finished look.


Hope you enjoyed.

xoxo

Thursday, June 9, 2011

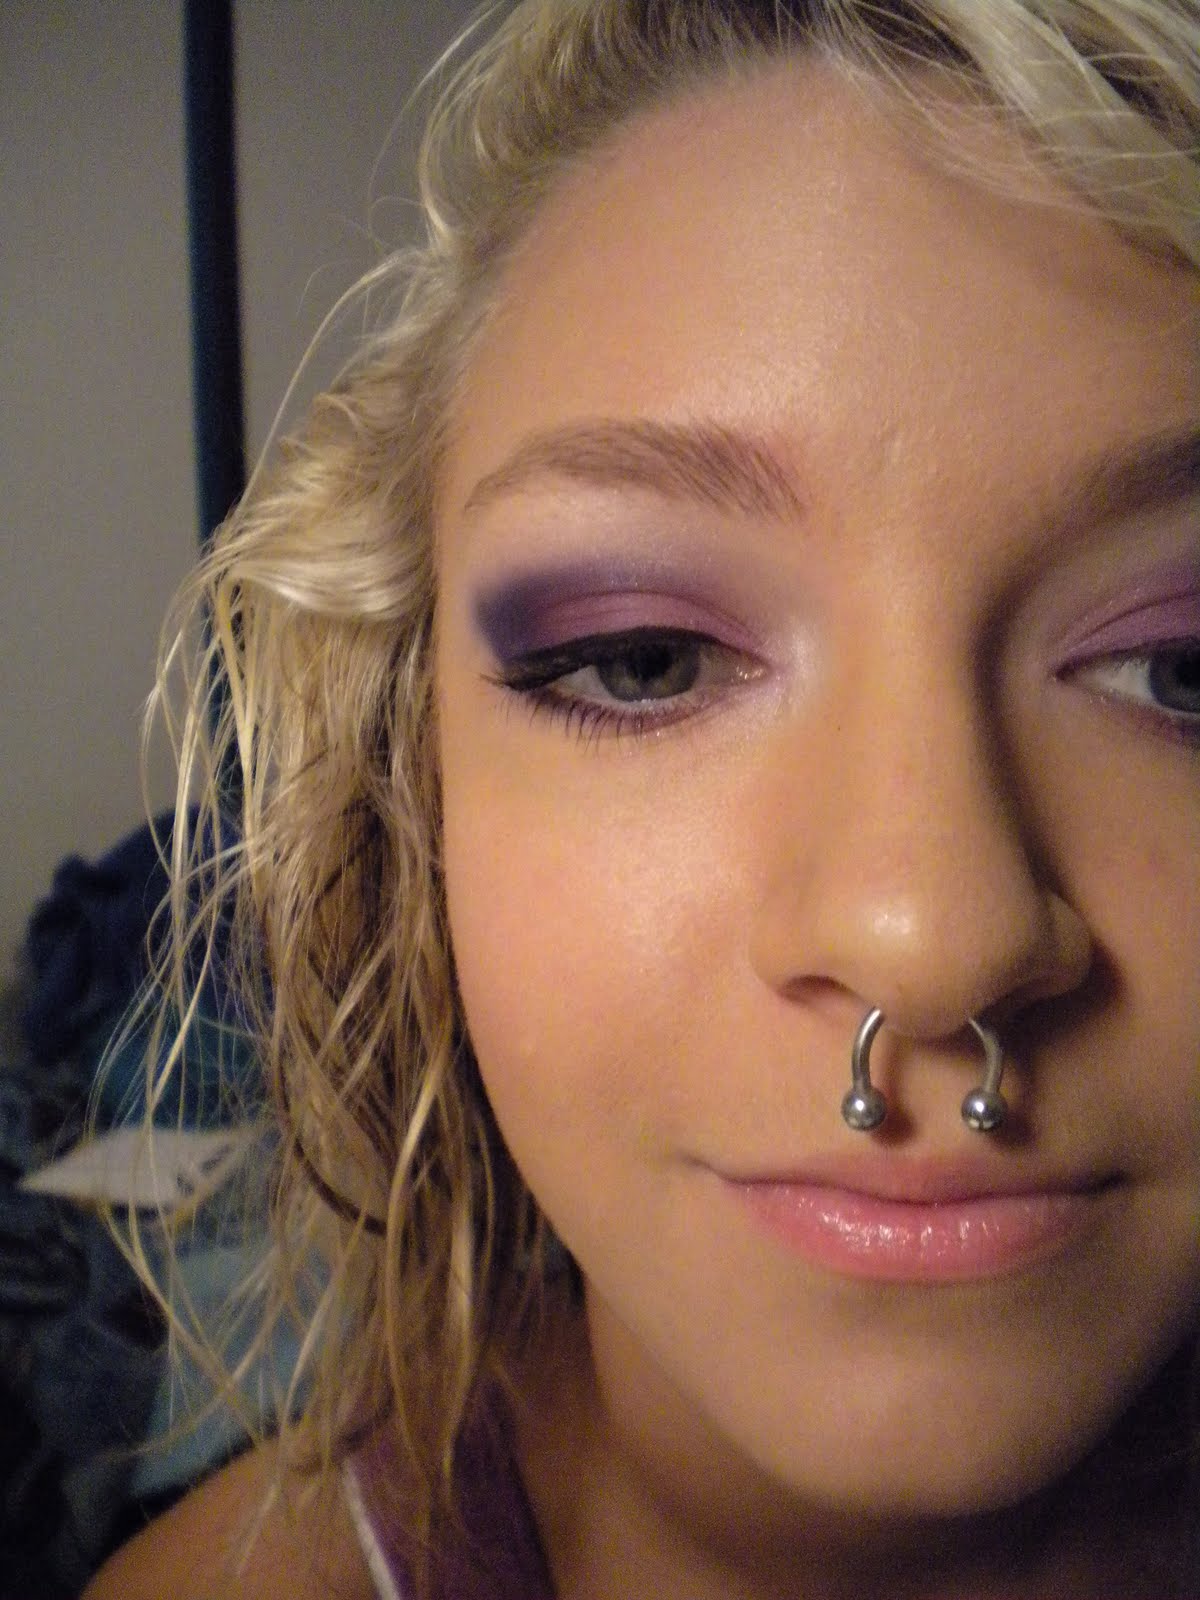
Tutorial: Purple Inglot Eyes!

Purple is my absolute favorite color to wear on my eyes. I feel like I own every purple shadow from every company that makes any purples! However.. this tutorial is using Inglot purples, which are amaazzing. Inglot might be my favorite cosmetic brand right now.

Anyway here is a couple shots of the look..
My camera is not the super best, but you get the idea.
Alright so I got it in some goofy lighting with some goofy faces but hey I am new to the tutorial making process! Okay!

Okay so the first thing I did was prime my eyes with Urban Decay Primer Potion in Eden, the matte one. Then I used NYX Jumbo Eyeshadow Pencil in Milk all over the lid and up into the crease a bit.

The first color I used was this one from Inglot. I'm not sure what the number is but I will put it in when I find out. It's a sparkly pinky purple. I applied this on the inner third of the eye.
Next I used this Inglot color on the middle third of my lid, using a small eye shadow brush and blending as I went.

After that I blended this dark purple Inglot shadow into the outer corner and blended it all the way over to the first color right under the brow bone.
I blended the edges with a fluffy brush, which was fairly easy because these shadows are so creamy and silky.
I used an opalescent white as a highlight under the brow and in the inner corner.
I finished with a thin line of black gel liner and mascara.

For the rest of the face I just used my foundation powder and then contoured with a matte bronzer and added a subtle peachy pink blush.

And then I finished with NYX Round Lipstick in Strawberry Milk and some clear sparkling glass over top of it.

Hope you enjoyed.

xoxo

Monday, June 6, 2011

Review: Cherry Culture


Hello friends! Today's review is not for a product, but a website. For those of you not familiar with Cherry Culture, it is a website that sells many different make up brands ranging from high end brands like Jelly Pong Pong and Beauty Blender sponges to drugstore brands like Milani. They also sell some brands that you can find in dollar stores such as LA Colors, which I don't really bother with.

The main reason you usually hear people talking about Cherry Culture, though, is for there huge range of NYX products. They might actually have the whole NYX line on their website. Anyway, the best part about Cherry Culture is that they sell NYX products for less than you see them on the NYX website or at ULTA, and it's always a plus for me when I can get the same product for less!


Cherry Culture not only has frequent sales on loads of their items, but most of the items are being sold at sale prices 24/7.

Cherry Culture should be an option for everyone looking for products from Beauty Blender to Sinful Colors. It makes finding products that you can only find in certain areas simple! For example, I've been searching for these Milani eye liners that I couldn't find in any stores near me that sell Milani, I found a quick fix from Cherry Culture!

Cherry Culture offers a great rewards program in which they give you one point for every dollar you spend. For every $250 you spend, which is quite easy ;), you receive a $10 gift card! That may not seem like much, but it is a lot more than what the NYX website will give you!

They also offer free shipping on orders over $40, for registered members, which is so simple to do, and US residents, and also a 25% discount for any order over $300 ! Which I appreciate because, as said before, it is so easy to spend spend spend on their website.

I just bought a massive haul worth of products form Cherry Culture and they should be arriving any day now. I think if you are looking for NYX or other drugstore brands, for cheaper than usual, check out Cherry Culture, which is linked above, and if a sale isn't going on on the products you are wanting to purchase just hold off for a couple weeks and check back because I'm sure they will have a sale soon!

Hope you enjoyed this long and thorough review lol.

xoxo

Sunday, June 5, 2011

Beachy Gold Nail Look

This summer peachy pinks and corals are a strong trend. I did a very simple nail art look using a peachy base and some gold glitter polish! Perfect for the beach or any summer day!

So, the first thing I did was use a base coat and the base coat I use is Seche Clear. Next I applied a peachy orange color, which was Wet n Wild's Blazed polish.
Next I used an Orly polish called Honeymoon In Style.. but I didn't really like the color when I bought so I did mix this color myself.. but it's just a sheer peachy pinky nude color.
The last thing I did was add a vertical stripe right down the middle and for that I used Sinful Colors All About You, which is a gold glitter.

And all you have to do is top it off with a top coat. As you could have guessed, I like Seche Vite, but obviously whichever one you prefer is perfect!
And here is the finished look..


So try this out for yourself this summer! It's super easy and the colors are all affordable and easy to get your hands on.. well I guess except for the Orly one because I mixed it myself lol.

Love & Luck

xoxo

Wednesday, May 4, 2011

Review: St. Ives Green Tea Scrub

Hey friends! Today I've got a review of a product I've been testing out for about a month or so now.
So, I picked this up at Walgreens about a month ago and I got in the small travel size. I smelled it in store and thought it was the most amazing scent so I had to get it. It was roughly $1.69. I looked around the face wash section for a bigger bottle, but they only had the travel size so I picked up several because they were only 1oz!

Anyway, I did figure out that there is a full size, very reasonably priced at $5-7.

Now on the the review. This product claims to that it
Clears breakouts and reduces redness Salicylic Acid Acne Medication With 100% Natural Green Tea, taken straight from the website. I noticed this product has much finer granules in it than the apricot scrub that I've been using religiously since I was 13. These granules actually seem to get deep into my pores and clear out my black heads even better than my apricot scrub made specially for black heads!

The smell is gorgeous. Very light and fresh. It doesn't necessarily smell like green tea, but more of a melon fresh fruit scent, which I adore.

This product, as previously stated, claims to reduce redness, which I have some of on my cheeks. I haven't really noticed a reduction in my redness, but it is helping my skin feel soft, smooth, and black head and breakout free.

I only have a few cons. I tend to chew on my cuticle area when I get bored or nervous, terrible habit but I do it, and when I get this scrub inside those "wounds" I guess you could call them it stings a little bit, but probably due to the fact that the granules are half the size of sand!

The only other con being I can't find the full size in any of the drugstores in my area! Hopefully I'm not looking hard enough though.

I do adore this product and although it says it's safe too use everyday, because it's not very abrasive, I like to switch it from day to day with my regular apricot scrub! :)

xoxo


Monday, May 2, 2011

Beauty Tip Monday!

Hey friends!

This Beauty Tip Monday I've got a super simple tip to help make your bright corals and blues pop for spring!

Now, this spring I'm rocking super bright fun nails! Here are some of my favorite colors this month...

                   China Glaze High Hopes          Sinful Colors Why Not               Sally Hansen Green With Envy


OPI Do You Lilac It

As you can tell I gravitate more to the cream colors because they have the best color pay off and I just prefer that finish on my nails. These colors are gorgeous and most of them are as bright as the sun!

Unfortunately, we all run into those colors that do not come out as bright and vibrant as they are in the bottle. What to do?

I almost always use a nice thin coat of China Glaze White On White before using my bright summer polishes.
This is going to amplify any color instead of just being on a skin tone background.
P.S. This works great if your nails have yellowed a bit or if you have really long nails and you don't want the space between finger and nail length to show !

Hope you enjoyed the tip!

xoxo